What is WSL?
Windows Subsystem for Linux (WSL) lets you install and run Linux distributions on Windows.
With WSL, you can run your favourite developer tools and productivity tools in one place, running both Linux and Windows simultaneously.
Why?
Traditionally you would either run a separate linix VM or setup a dual-booting system.
WSL negates the need to install VM’s or have a dual-boot system configured by integrating Windows and Linux. This allows for a much smaller resource footprint, requiring fewer resources (CPU, memory, storage) compared to traditional virtual machines. You can now run your favourite apps, dev tools, etc. right alongside your Linux development environment.
WSL2
Microsoft announced WSL 2 in May 2019, introducing important changes to the WSL architecture, including a real Linux kernel run through a subset of Hyper-V features. The WSL 2 architecture significantly improved performance, delivering faster system calls, and fewer limitations. WSL 2 is now the default architecture used when installing a Linux distribution on Windows.
The WSL architecture lets any Linux distribution run on your Windows computer and supports running GUI apps (not just command-line tools) ,follow the following tutorial to get started.
Install the WSL core binaries
Make sure that you’re running Windows 11 or Windows 10 version 2004+ (Build 19041 and higher) to run the WSL install command.
By default when you run the “wsl –install” command it will install the Ubuntu distribution by default.
Run the following command to see a list of alternative distro’s “wsl –list –online“
You should get a similar result to this.
wsl --list --online
The following is a list of valid distributions that can be installed.
The default distribution is denoted by '*'.
Install using 'wsl --install -d <Distro>'.

  NAME                                   FRIENDLY NAME
* Ubuntu                                 Ubuntu
  Debian                                 Debian GNU/Linux
  kali-linux                             Kali Linux Rolling
  Ubuntu-18.04                           Ubuntu 18.04 LTS
  Ubuntu-20.04                           Ubuntu 20.04 LTS
  Ubuntu-22.04                           Ubuntu 22.04 LTS
  OracleLinux_7_9                        Oracle Linux 7.9
  OracleLinux_8_7                        Oracle Linux 8.7
  OracleLinux_9_1                        Oracle Linux 9.1
  openSUSE-Leap-15.5                     openSUSE Leap 15.5
  SUSE-Linux-Enterprise-Server-15-SP4    SUSE Linux Enterprise Server 15 SP4
  SUSE-Linux-Enterprise-15-SP5           SUSE Linux Enterprise 15 SP5
  openSUSE-Tumbleweed                    openSUSE Tumbleweed
Note: If a Linux distribution that you want to install isn’t available in the Microsoft Store, you can still install it by importing using a .tar file or .appx file.
Run the following command in powershell “wsl –install“
Installing: Virtual Machine Platform
Virtual Machine Platform has been installed.
Installing: Windows Subsystem for Linux
Windows Subsystem for Linux has been installed.
Installing: Ubuntu
Ubuntu has been installed.
The requested operation is successful. Changes will not be effective until the system is rebooted.
After rebooting you will be asked to enter a username and password as below:
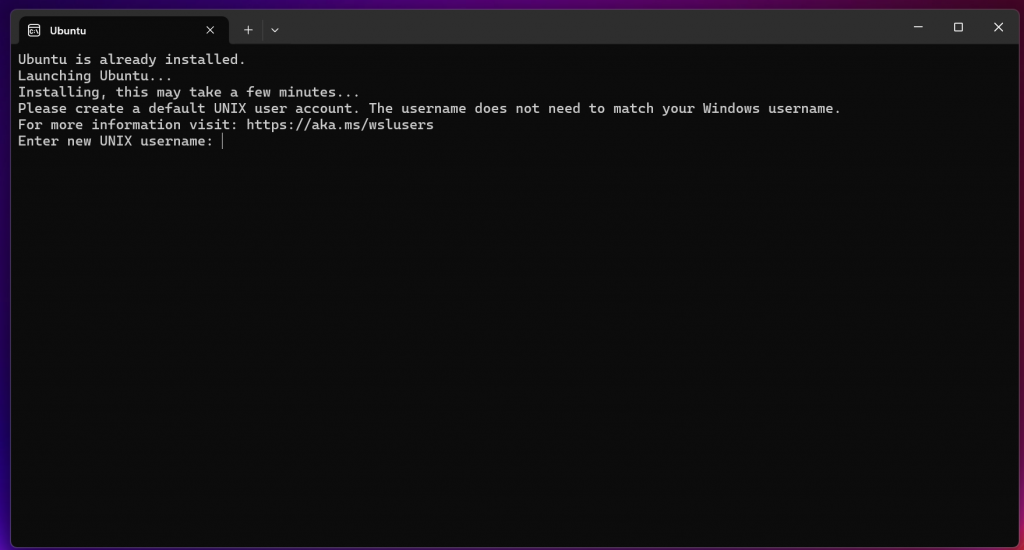
The username and password created here will be considered the Linux administrator, with the ability to run sudo (“superuser do”) administrative commands.
Update and upgrade the packages for Ubuntu using the Advanced Packaging Tool (APT) with the following command : “sudo apt update && sudo apt upgrade” this updates the list of available packages and then upgrades them to the latest release.
Ubuntu will now also be available in the Windows Terminal shell to login to.
I will be using WSL with Visual Studio Code, for this to work we need to install the VS Code WSL extension.
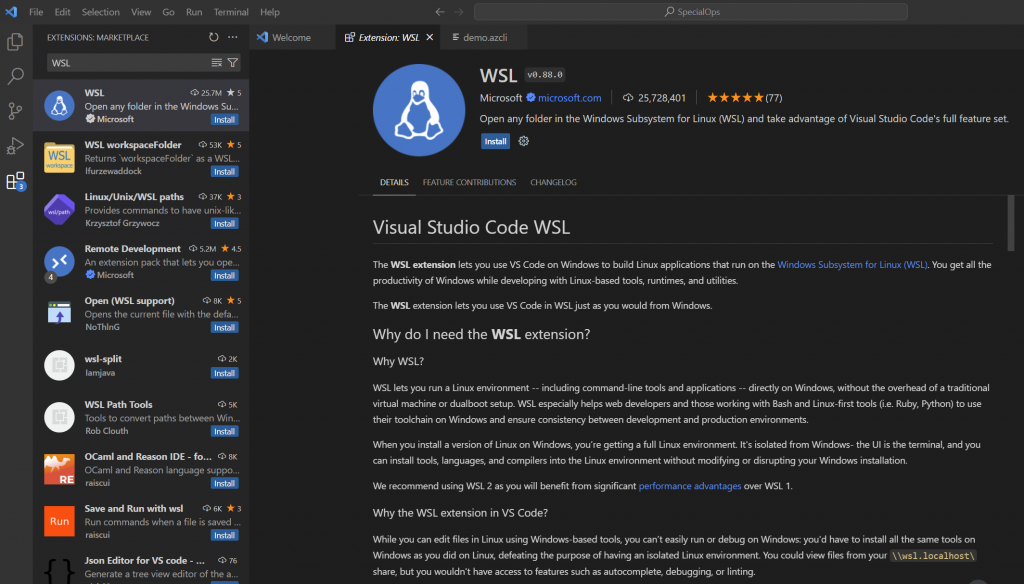
One reason for using VS Code is the WSL extension. This extension enables VS Code user’s interface to run on Windows, while your commands, extensions, debugging, code autocomplete, linting, etc. all operate on the WSL Linux installation.
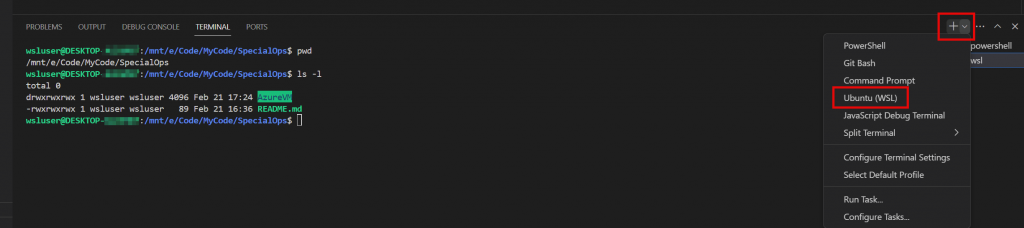
Ubuntu is now available as an option in VS Code panel as show in red below.
By default WSL automatically gives file access to Windows files and Windows paths and the Linux file system.
wsluser@DESKTOP-XXXXXXXX:/mnt/e/Code/MyCode/SpecialOps$ relates to a windows folder on my E: drive. The full path would be e:\Code\MyCode\SpecialOps
To move to the Linux file system we need to move to our home folder, one way to-do this is use the “cd ~” command.
wsluser@DESKTOP-:XXXXXXXX:/mnt/e/Code/MyCode/SpecialOps$ cd ~
wsluser@DESKTOP-XXXXXXXX~$ pwd
/home/wsluser
wsluser@DESKTOP-XXXXXXXX:~$
Store project files that you will be running in Linux on your Linux file system (not on the Windows file system) for better performance.
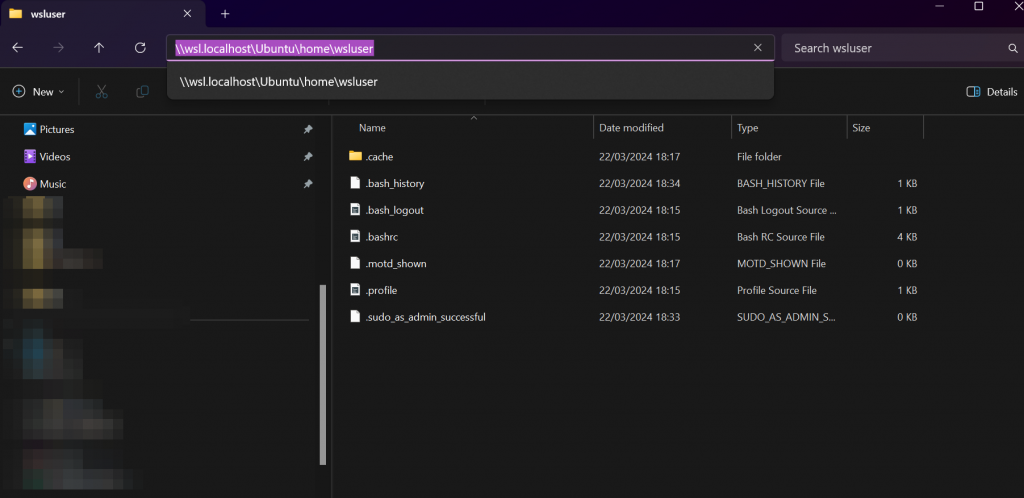
You can also directly access the Linux filesystem from Windows Explorer or PowerShell using the following path information : “\\wsl.localhost\Ubuntu\home\wsluser”
Installing the Azure CLI on Linux WSL
Now that Ubuntu is up and running we can login through the Windows Terminal and install the Azure CLI. This does not need to be installed on windows. The following article goes into detail but the easiest way to install the Azure CLI is through a script maintained by the Azure CLI team.
Execute the following command in the bash shell: curl -sL https://aka.ms/InstallAzureCLIDeb | sudo bash
After the programs are install you can run the “az –version” command to conform it’s installed correctly, the output should look similar to the below output:
wsluser@DESKTOP-XXXXXXXX:~/azcli-scripts$ az --version
azure-cli                         2.58.0

core                              2.58.0
telemetry                          1.1.0

Dependencies:
msal                              1.26.0
azure-mgmt-resource             23.1.0b2

Python location '/opt/az/bin/python3'
Extensions directory '/home/wsluser/.azure/cliextensions'

Python (Linux) 3.11.7 (main, Feb 29 2024, 02:08:19) [GCC 11.4.0]

Legal docs and information: aka.ms/AzureCliLegal


Your CLI is up-to-date.
Now create a project folder on the Linux filesystem
cd ~
mkdir your-project-folder
cd your-project-folder
code .
The “code .” command will install the server side extension on the Ubuntu platform
wsluser@DESKTOP-XXXXXXXX:~/azcli-scripts$ code .
Installing VS Code Server for x64 (863d2581ecda6849923a2118d93a088b0745d9d6)
Downloading: 100%
Unpacking: 100%
Unpacked 1538 files and folders to /home/wsluser/.vscode-server/bin/863d2581ecda6849923a2118d93a088b0745d9d6.
wsluser@DESKTOP-XXXXXXXX:~/azcli-scripts$
VS Code should now start-up on windows, to get IntelliSense and other benefits install the “Azure CLI Tools” extension in WSL, make sure the extension says it’s been enabled for WSL: Ubuntu.

Finally your need to sign-in to Azure, unless you have installed a GUI, your either need to paste in the “az login” output or sign-in using the “az login –use-device-code” method.
Once authenticated you can run all your commands against the tenant and related subscriptions.
Hope this has been useful to you.