Cisco VIRL allows you to add support for 3rd Party VM’s. I’m going to show you how to add the FortiGate virtual appliance to VIRL.
First of all you will need the FortiGate Virtual Machine from http://www.fortinet.com. We will be using the KVM image provided by Fortinet, other versions are available i.e. ESXi, Hyper-V, etc so make you get the right one.
I will be using “FGT_VM64_KVM-v500-build3608-FORTINET.out.kvm.zip” in this example.
The FortiGate VM includes a limited embedded 15-day trial license that supports:
- 1 CPU maximum
- 1024 MB memory maximum
- low encryption only (no HTTPS administrative access)
- all features except FortiGuard updates
You cannot upgrade the firmware, doing so will lock the Web-based Manager until a license is uploaded.
Technical support is not included. The trial period begins the first time you start FortiGate VM. After the trial
license expires, functionality is disabled until you upload a license file.
Before you can upload the KVM image into VIRL we need to create a new custom Subtype. A custom Subtype allows you define what resources your image will use for example what Management, Data Interfaces, RAM, and CPU we allocate. We can only create custom subtype’s based on existing predefined subtypes.
We will be basing ours on the “Generic Subtype”
To create a new custom Subtype, login to VIRL “User Workspace Management” using your browser http://V.I.R.L
Select “Subtypes” from the left-hand menu.
Click the dropdown at the end of the generic row and click the “Specialize” button.

Set the following property for the image.
- Name of new subtype: FORTiOS
- Description of plugin: Fortinet Firewall
- Name of management interface: port1
- Pattern for data interface names: port{0}
- First data interface number: 2
- Max count of data interfaces: 7
- Number of serial interfaces: 1
- Protocol for network CLI: telnet
- Make VNC access available: Enable this option
- Show subtype on GUI palette: Enable this option
- Virtual interface model: virtio
- Main disk bus model: virtio
- RAM (MB) allocated per node: 1024
- Number of CPUs allocated per node: 1
Click Create
Now we have created our custom subtype we can configure the image.
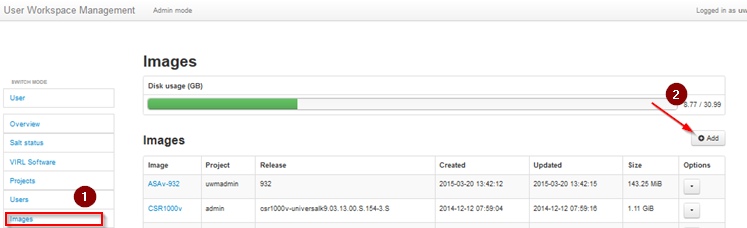
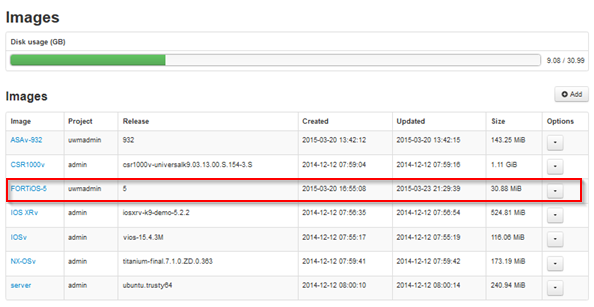
Select Images from the left-hand menu and then click add.
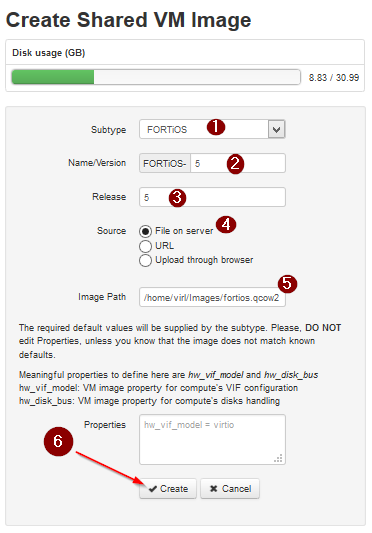
Set the image subtype and release version and either upload the image through the browser or from file on server, for the file on server method you must have already upload the fortios.qcow2 image. Click Create.
You should now have the FORTiOS listed under images as below.
We now need to refresh the Node types in VM Maestro so the icon show’s up in the palette.
Select File Preference – Node Subtypes – then click Fetch from Server.
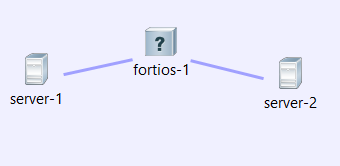
Create a new topology and add the FORTiOS device from the palette.
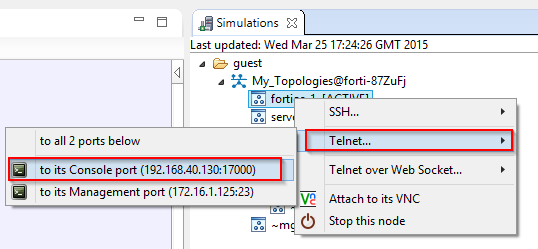
Launch the simulation and connect to the console port via telnet. You should also be able to connect using the VNC port.
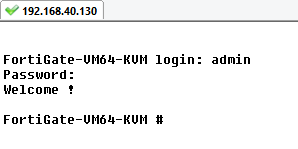
At the FortiGate VM login prompt enter the username admin. By default there is no
password. Just press Return.
Once we are connected we can configure the management port to allow external access using http and telnet.
Because the OOB management IP address is assigned at runtime, we have to configure our management port on the FortiGate to MATCH the one assigned by VIRL at run time.
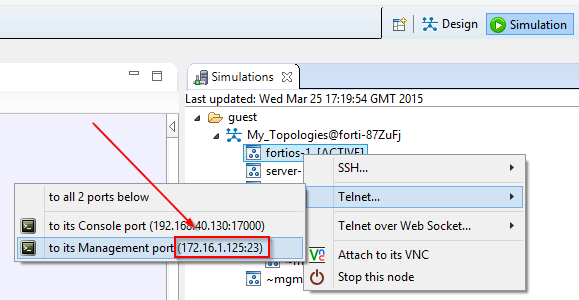
In the example above 172.16.1.125 has been assigned to the OOB Management port.
Using the console connection, configure the Management port on the Fortigate as below. You will need to change the IP address to match what VIRL has assign at runtime. HTTP access must be enabled because until it is licensed the FortiGate VM supports only low-strength encryption. HTTPS access will not work.
config system interface
edit port1
set ip 172.16.1.25 255.255.255.0 <— set this to the management ip addess assigned by VIRL at runtime.
append allowaccess http
append allowaccess ping
append allowaccess telnet
end
After the configuration has been applied you should have access via HTTP and telnet directly over the management network.
Note: We are using the FLAT L2 network for OOB management not L3 SNAT in this example.
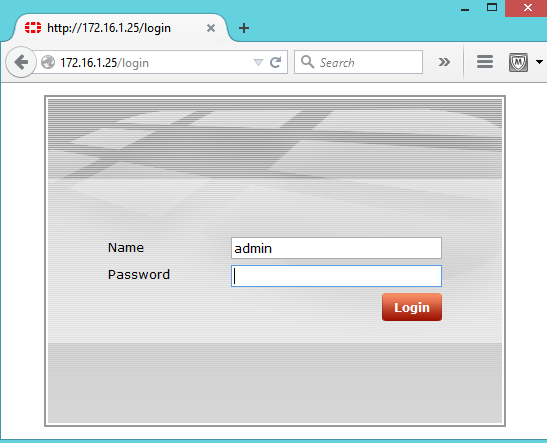
Open a browser and connect to the OOB management IP address http://172.16.1.25 (for example) and you will be presented with the FortiGate login page.
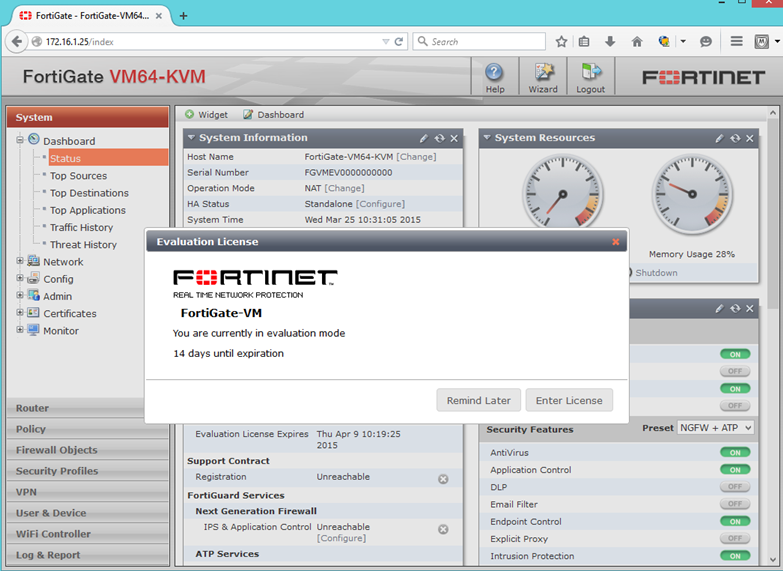
Once logged in you will be able to configure the other interfaces and options using the GUI.
Enjoy..
For additional information on custom subtypes have a look at the following VIRL YouTube video.
I just followed these instructions and everything went well up to the point where I started the simulation. I got the following error:
Image “FORTiOS” was not found in OpenStack
Traceback (most recent call last):
File “/usr/local/lib/python2.7/dist-packages/flask/app.py”, line 1475, in full_dispatch_request
rv = self.dispatch_request()
File “/usr/local/lib/python2.7/dist-packages/flask/app.py”, line 1461, in dispatch_request
return self.view_functions[rule.endpoint](**req.view_args)
File “”, line 2, in simengine_launch
File “/home/jenkins/jenkins/jobs/VIRL_CORE_build/workspace/test-virl-repo/virl/std/implementation.py”, line 234, in middleware
File “/home/jenkins/jenkins/jobs/VIRL_CORE_build/workspace/test-virl-repo/virl/std/implementation.py”, line 1017, in simengine_launch
File “/home/jenkins/jenkins/jobs/VIRL_CORE_build/workspace/test-virl-repo/virl/std/management.py”, line 1132, in add
File “/home/jenkins/jenkins/jobs/VIRL_CORE_build/workspace/test-virl-repo/virl/std/management.py”, line 1769, in _after_create
File “/home/jenkins/jenkins/jobs/VIRL_CORE_build/workspace/test-virl-repo/virl/low_level/implementation.py”, line 2338, in can_start
File “/home/jenkins/jenkins/jobs/VIRL_CORE_build/workspace/test-virl-repo/virl/openstack/client.py”, line 732, in get_image_id
ClientException: Image “FORTiOS” was not found in OpenStack
Happen to have any suggestions?
I actually figured this out. In the design pane after your drag the fortigate fw to the topology, you have to pikc the ‘VM Image’ property under the node tab. That was it.
Now it would just be nice if I didn’t have to register and restore my configuration everytime I shutdown my simulation.